• Creamy Chunky Mashed Potatoes

    Chunky mashed potatoes are always a crowd pleaser. This classic side dish is extra buttery, extra creamy, and extra delicious!

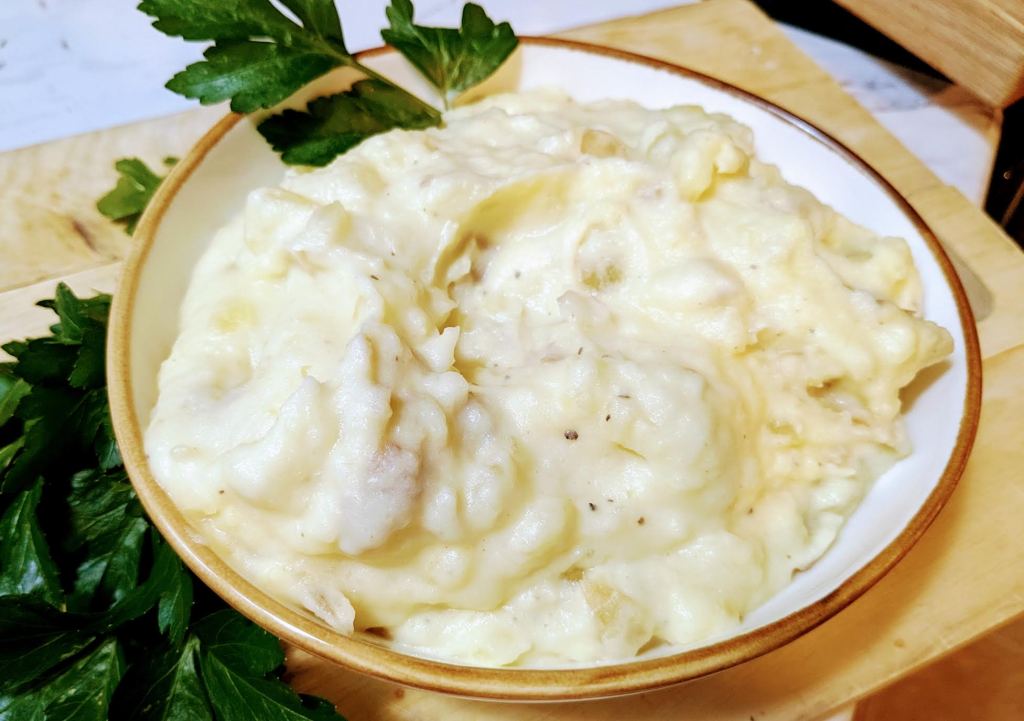
    Buttery and Delicious, Creamy Chunky Mashed Potatoes

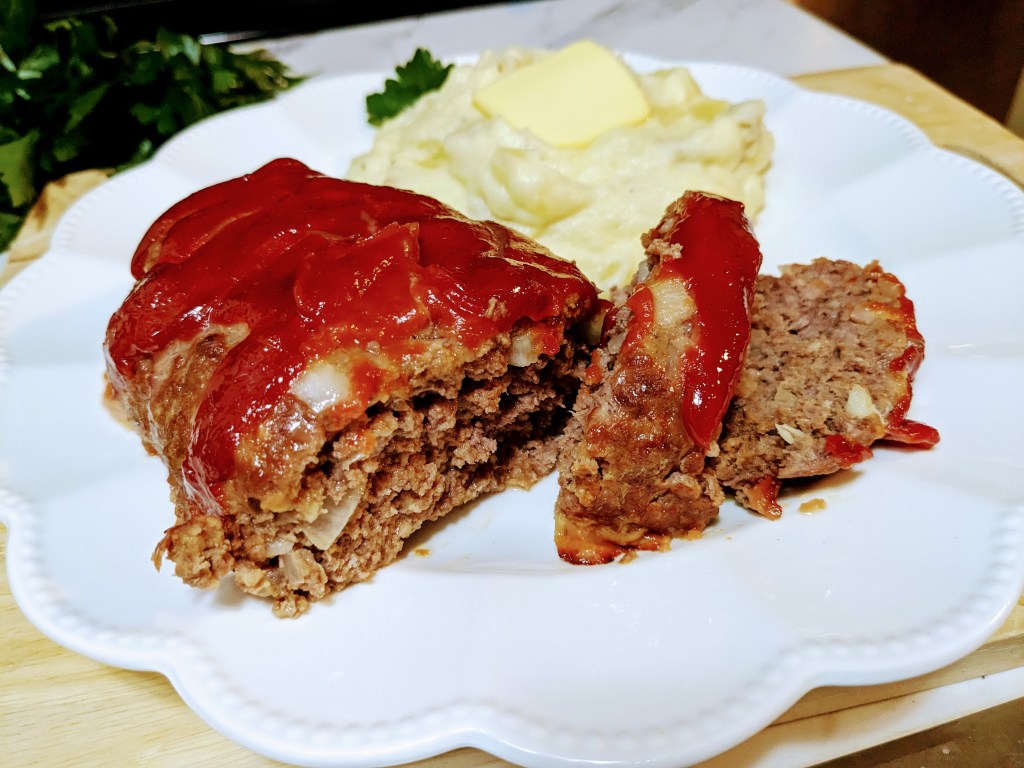
    Everyone loves mashed potatoes in my house, and I mean EVERYONE. From my husband, to our 8 year old, to the toddler and the baby (even the dog). They are great with a classic American dinner like juicy meatloaf, and leftovers are just as good as the first day. They are relatively easy to make, and with only 3 base ingredients necessary, I usually have what I need to whip them up if I don’t have a dinner plan.

    What kind of potatoes are the best?

    You can really use any potato, although the best are Yukon Gold or Russet. I used to always use red potatoes, because they have a great flavor, but I could never get them fluffy enough. Turns out red potatoes aren’t starchy enough for mashed, and you need a good starchy potato for nice and fluffy mashed potatoes. I love using yellow potatoes, because they are starchy and have an amazing flavor.

    How should I cook the potatoes?

    You can boil them whole or cut them into pieces. I usually cut them into 1″-2″ pieces before boiling, because they cook soooo much faster, and with 3 kids to feed and a busy schedule, I don’t have time to waste when it comes to getting dinner on the table. For this reason, I also leave the skins on. We enjoy them with the skins, and if you don’t like skin in your mashed potatoes it’s easy enough to peel them before you cut and boil them.

    What about the butter?

    Ah, yes, butter. Arguably the most important ingredient in mashed potatoes (other than the potatoes of course). We use A LOT of butter in our mashed potatoes. I mean A LOT. I add it when I am making it, then top it with a tab of butter when serving. My kids love a little volcano of mashed potatoes with melted butter lava in the middle. Its pleasing to the eye, fun, and in turn they eat more of their dinner (which let’s face it, getting your kids to eat is always the goal of dinner).

    What else can I add?

    There are so many way to dress up mashed potatoes. We always use butter (of course), and sometimes use gravy on top. Chives are always a great option too, plus the kids like to help with dinner and cutting herbs is always a great way to keep them occupied and feeling involved while I’m busy. Here are some more options below:

    • bacon
    • sour cream
    • carmelized onions
    • caramelized mushrooms
    • garlic
    • cheeddar

    How to store leftovers

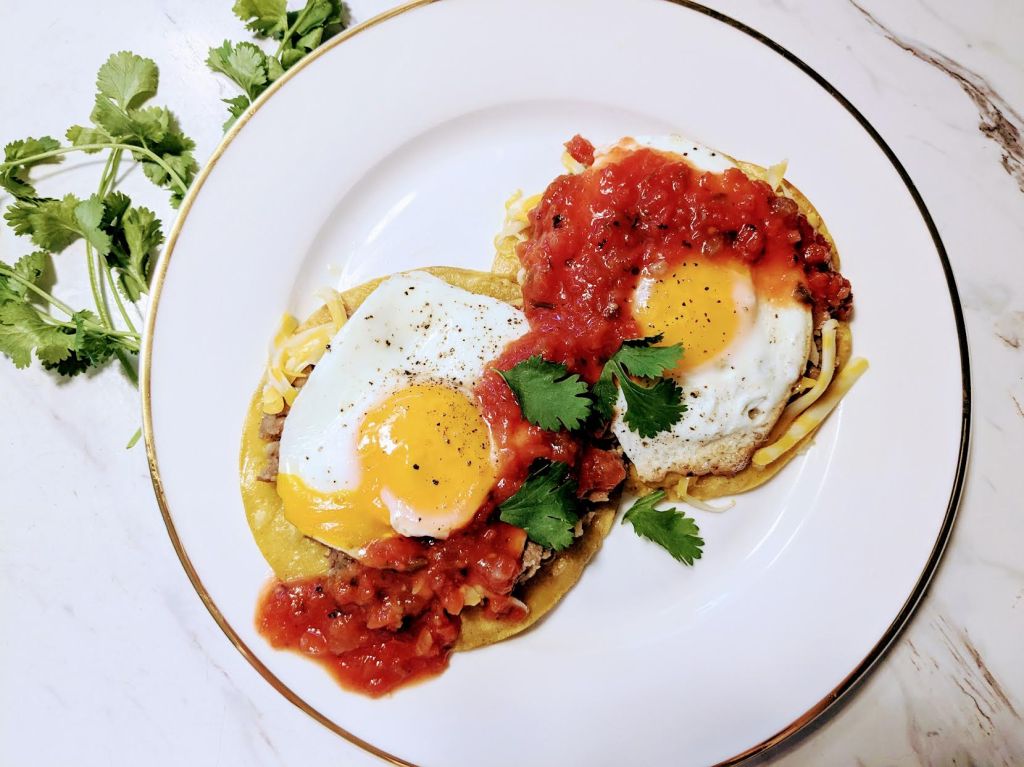
    Place in an airtight container in the refrigerator and they will keep for 3-4 days. They keep really well, and we love to make potato pancakes for breakfast the next day. They go great with sunny side up eggs and are super quick to whip up. I am all for using up all of our food and not wasting anything, so I usually have a plan to make a new meal out of whatever leftovers we have.

    Creamy Chunky Mashed Potatoes Recipe

    Cook Time 30 minutes

    Mashed potatoes are like the ultimate side dish that everyone just can’t get enough of. This recipe is gonna show you how to whip up some super buttery, creamy, and oh-so-deliciously chunky mashed potatoes that will totally wow the fam. Here’s what you’re gonna need:

    Ingredients:

    • 2 pounds of Yukon Gold or Russet potatoes
    • 3/4-1 stick of butter, softened
    • 1/4 cup sour cream
    • 1/2 cup of whole milk or heavy cream
    • Salt and pepper to taste

    Instructions:

    1. Start by washing the potatoes thoroughly to remove any dirt. You can leave the skin on for added flavor and texture, or peel them if you prefer smoother mashed potatoes.
    2. Cut the potatoes into 1″-2″ chunks to ensure even cooking. This will also help shorten the cooking time.
    3. Place the potato chunks into a large pot and cover them with cold water. Add a generous pinch of salt to the water.
    4. Bring the water to a boil over medium-high heat and then reduce the heat to a simmer. Cook the potatoes for about 15-20 minutes or until they are fork-tender. They should be easily pierced with a fork but not too mushy.
    5. Once the potatoes are cooked, drain them well and return them to the pot.
    6. Add the butter, milk, and sour cream to the pot and use a potato masher or KitchenAid mixer to mash the potatoes until they reach your desired consistency (we like them extra chunky!)
    7. Season the mashed potatoes with salt and pepper to taste. Remember to taste as you go and adjust the seasoning and butter accordingly. The potatoes will absorb the salt so you may need more than you think. I use about a tablespoon.
    8. Give the mashed potatoes a final stir to ensure that the butter and seasonings are evenly distributed.
    9. Serve the creamy chunky mashed potatoes immediately while they are still warm and enjoy!

    Feel free to get creative with toppings and add-ins like bacon, sour cream, caramelized onions, mushrooms, garlic, or cheddar cheese. These will add extra deliciousness to your mashed potatoes.

    Leftovers can be stored in an airtight container in the refrigerator for 3-4 days. You can also use any leftovers to make tasty potato pancakes for breakfast the next day.

    Enjoy your hearty and comforting homemade mashed potatoes!

  • Juicy and Flavorful Meatloaf

    Moist meatloaf is like the ultimate comfort food. It’s super tasty and totally hits the spot. You mix up some ground meat, breadcrumbs, eggs, and a bunch of seasonings, and bam, you’ve got a comforting meal that’s all about your personal flavor. So, the key to making a really moist and tender meatloaf is all in the ingredients and how you cook it. Toss in some diced onions and maybe a dash of milk to keep that meatloaf nice and juicy as it cooks. Oh, and don’t forget to bake it at a moderate temp and use a meat thermometer to make sure it’s just right inside and doesn’t dry out. Personally, I like to stick a cake pan with some water below the meatloaf in the oven to keep things extra moist. I’ve even experimented with shredded carrots for some extra flavor and moisture, but my fam always goes for the classic plain meatloaf.

    Leftovers?

    I always make extra meatloaf, because it keeps so well and makes great sandwiches for second dinner or lunch the next day. It goes perfectly with homemade sourdough and mayo.

    Whether you’re into it as is or jazzed up with a zesty glaze, juicy meatloaf is a super satisfying and tasty dish that’s bound to make the whole family happy.

    Here’s my delicious meatloaf recipe that uses ketchup as a glaze:

    Ingredients:

    • 1 ½ pounds ground beef
    • 1/3 cup breadcrumbs
    • 1 small onion, finely chopped
    • 2 garlic cloves, minced
    • 2 eggs
    • 1/4 cup ketchup
    • 2 tablespoons Worcestershire sauce
    • 1 teaspoon salt
    • 1/2 teaspoon black pepper
    • 1/3 cup milk

    For the glaze:

    • 1/2 cup ketchup

    Instructions:

    1. Preheat your oven to 350°F (175°C).
    2. In a large bowl, combine the ground beef, breadcrumbs, onion, garlic, eggs, ketchup, Worcestershire sauce, salt, black pepper, and milk. Mix well until all the ingredients are evenly incorporated.
    3. Shape the mixture into 2 even loaves and place on a baking sheet a few inches apart.
    4. Coat the loaves with the ketchup.
    5. Bake the meatloaves in the preheated oven for about 45 minutes, or until the internal temperature reaches 160°F (70°C) using a meat thermometer.
    6. Remove the meatloaves from the oven and let them rest for a few minutes before slicing and serving.
    7. Best served with mashed potatoes.

    Enjoy your flavorful meatloaf with a tangy ketchup glaze!

  • 4 Ingredient Sugar Cookies
    Sugar Cookies

    Sugar cookies are a beloved classic that never fail to delight. With their buttery texture and delicate sweetness, they are a versatile treat that can be enjoyed on any occasion. Whether you’re looking to bake for a holiday gathering, a special celebration, or simply to satisfy your sweet tooth, these simple sugar cookies are sure to please. With just a few basic ingredients, you’ll be on your way to creating a batch of delicious cookies that are as beautiful as they are scrumptious. So let’s dive into this easy sugar cookie recipe and get baking!

    Ingredients:

    • 2 cups all-purpose flour
    • 1 cup unsalted butter, softened
    • 2/3 cup white sugar
    • 1 teaspoon vanilla extract

    Instructions:

    1. Preheat your oven to 325°F (190°C). Line baking sheets with parchment paper.
    2. In a large mixing bowl, cream together the softened butter and sugar until light and fluffy.
    3. Beat in the vanilla extract.
    4. Gradually add the flour to the butter mixture, mixing until just combined. Be careful not to overmix.
    5. Roll the cookie dough into 1-inch balls and place them on the prepared baking sheets, leaving some space between each cookie.
    6. Use the bottom of a glass to gently flatten each cookie.
    7. Sprinkle sugar on the top.
    8. Bake for about 8-10 minutes, or until the edges turn golden brown.
    9. Remove from the oven and let the cookies cool on the baking sheets for a few minutes before transferring them to a wire rack to cool completely.
    10. Once the cookies are completely cooled, you can decorate them with icing, sprinkles, or any other toppings of your choice.

    Enjoy these delicious sugar cookies with a glass of milk or your favorite hot beverage!

    To store sugar cookies and keep them fresh, follow these steps:

    1. Allow the cookies to cool completely: Before storing sugar cookies, ensure they are completely cooled to room temperature. This will prevent moisture buildup and maintain their texture.
    2. Choose an airtight container: Select a clean and dry container with an airtight seal, like a cookie jar, plastic container, or resealable bag. Avoid using containers that are not airtight, as they can cause the cookies to become stale.
    3. Layer the cookies properly: Place a sheet of parchment paper or wax paper between each layer of cookies to prevent them from sticking together. This is important for maintaining their shape and appearance.
    4. Avoid stacking too high: If you have multiple layers of cookies, avoid stacking them too high to prevent breakage. It’s best to keep the layers relatively flat.
    5. Store in a cool, dry place: Find a cool and dry spot to store the container of sugar cookies. Avoid areas with direct sunlight or excess humidity, as these can affect the texture and taste of the cookies.
    6. Avoid strong odors: Sugar cookies can absorb strong odors, so keep them away from foods with strong aromas. It’s wise to store them separately or in a container that won’t allow odor transfer.
    7. Check for freshness: Periodically check the cookies for freshness. If you notice any signs of staleness or spoilage, remove those cookies to prevent them from affecting the rest.

    By following these guidelines, you can store sugar cookies properly and enjoy their freshness for several days. Happy snacking!

  • Huevos Rancheros

    A filling and delicious breakfast!

    Huevos Rancheros is soooooooo good. Everyone in my family loves this dish, and it only takes about 20 minutes to cook. Plus they are a beautiful dish, so when you make these everyone will be eating them with their eyes. Take your cooking skills up a notch with this appetizing breakfast!

    Huevos Rancheros is a quick simple and amazingly delicious recipe that I make at least once a week. You can substitute so many parts of this dish, I find I am always able to make it for breakfast as long as I have tortillas and a protein.

    What is Huevos Rancheros?

    Huevos Rancheros is basically a fried tortilla with refried beans, cheese, eggs and salsa.

    • Tortillas – I prefer to use the small corn tortillas, but I have also used flour and both are always good! I pan fry them in some oil first to get them nice and crispy and to open up the flavors of the tortilla. I don’t buy any special brand, I usually just get what is on sale or the lowest price.
    • Beans – You can just use canned refried beans (Aldi has really good tasting inexpensive beans) or you could make them, which is very simple and quick. I never knew how easy it was to make the refried beans for huevos rancheros until I ran out. I looked up a recipe and lo and behold, I had some pinto beans in my cabinet and whipped them up in 5 minutes. Now I just make them every time since it is so easy and delicious.
    • Cheese – Sometimes I use fresco cheese, sometimes I use cheddar, sometimes I use Colby jack. This particular recipe uses Colby jack, but that’s just because it’s what was in my fridge. The only stipulation with the cheese is that is should be freshly shredded. I don’t like to buy any pre-shredded cheese, since there is always some kind of junk that isn’t good for you in there in order to prevent the cheese from sticking to itself.
    • Salsa – As for the salsa, I also get a really good salsa from Aldi. It’s mild organic, and is so flavorful and delicious. My husband has a little garden in our backyard, so when the season is right we make our own salsa. You just can’t beat the feeling of growing your own food and making something out of it. It always tastes better because you put the love and time into it.
    • Eggs – I prefer to use pasture raised eggs. They have a much better flavor, texture, and color which makes them more appealing and in turn helps people to enjoy them more. People always love eating pretty food!

    What if someone doesn’t like sunny side up eggs?

    You can easily substitute for scrambled or even use a different protein like steak. My daughter loves sunny side up eggs but my husband doesn’t like any “runny” in his eggs. I find it easy enough to just make hers and the scramble a few for him, with this meal it is easy to cater to everyone’s preferences. You can also omit the eggs for a delicious vegetarian version (I use this version for my vegetarian sister) that is still protein rich from the pinto beans.

    Ingredients

    • 5 small corn tortillas
    • 5 eggs
    • 1 can refried beans (or homemade!)
    • 1/2 block of shredded Colby jack
    • salsa

    Recipe

    • Start by frying the tortillas in a little bit of olive oil on medium heat. Flip them after they have started to become golden on the bottom, this takes about 2-3 minutes.
    • While the tortillas fry, heat up the beans in the microwave for a couple minutes or pan fry to warm. Set aside
    • Warm some butter in a pan over medium-low heat, and crack the eggs into the pan. Season with salt and pepper. Cover and cook until desired doneness.
    • When the tortillas are done, spread the refried beans on top. Then sprinkle some cheese, layer with eggs and top with salsa. Bonus points if you garnish with fresh cilantro.

    And that’s it! It’s that simple. You have an amazing dish that looks fancy and everyone will be impressed with your cooking. Serve immediately. Some like to eat with a fork and spoon, and others (like me) like to just pick it up and eat it like a taco. Yes, it’s messy, but who doesn’t love a good meal that you eat with your hands and just can’t put down until it’s gone.